


For the past 15 years or so, graphics technology in games has been driven by shooters. Most shooters generate visual interest in their scenes by having lots of dynamic lights, with extreme use of bump mapping, and moving shadows, and particle effects.
For The Witness, I wanted to develop a graphical style that values simplicity. It would be suited to mellower environments, with both indoor and outdoor settings. Some kind of global illumination solution seemed like the right idea here. (Global illumination is when you simulate light bouncing around in a scene; the resulting look is usually much richer and subtler than the direct lighting that games usually do.)
Clearly, full real-time global illumination would be the most versatile solution. I investigated some licensable packages that provide this, such as Geomerics' SDK. However, these solutions will invariably use a lot of texture space, and consume a bunch of processing time, and they seem like overkill for this game (The Witness does not have many moving light sources, relative to other types of games).
So, some form of precomputed global illumination seemed like the right thing. 3D modeling packages have plugins to compute global illumination, but they are very difficult to interface with, and they could not even come close to handling a full game scene. The only thing that knows where all the objects in the world are at once is the game itself (and the in-game editor), so it seemed appropriate to develop our own in-game system for global illumination. It could have been radiosity, could have been something like Monte Carlo Path Tracing, but Charles Bloom suggested the very simple solution of just rendering the scene for every pixel in a lightmap, and that seemed like a good idea. With an approach like that, you don't have to do a bunch of monkeying around to make radiosity or ray tracing match the completely different algorithm that is used to render your realtime game scene; light transport is computed by that same algorithm, so it will automatically match unless you mess things up.
For several months, Ignacio Castaño has been working on this system. He is writing up a highly technical explanation of how the system works, which I think he'll be done with in a few days, but in the meantime, here is a lighter-weight overview.
At preprocess time, we just walk a camera over every surface, pointing the camera away from the surface and rendering the game scene into a hemicube in video memory. The render target textures of a hemicube are packed together into an atlas, and when the atlas fills up, we download it into system memory, integrate the values in each hemicube to find an average light value, and then store that value in the lightmap. Most of the shots below were generated using 128x128 cube maps and multiple samples per texel.
Because we are just using our regular rendering code, this precomputation process is hardware-accelerated by default.
Note: In the images below, all geometry and textures are placeholders. As with Braid, we are using rough-draft versions of all these things while the core gameplay is built. Bloggers, these are not to be considered screenshots of the game. They aren't supposed to look good yet -- they are just supposed to show the precomputed lighting.
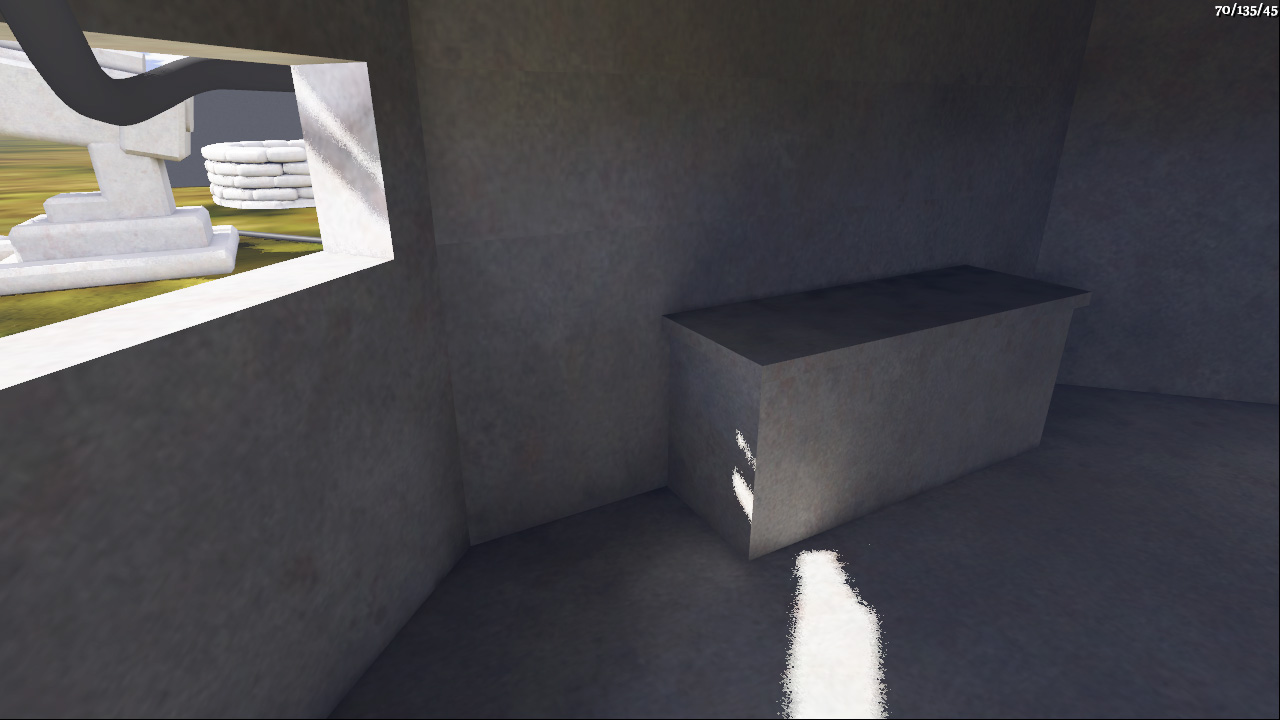
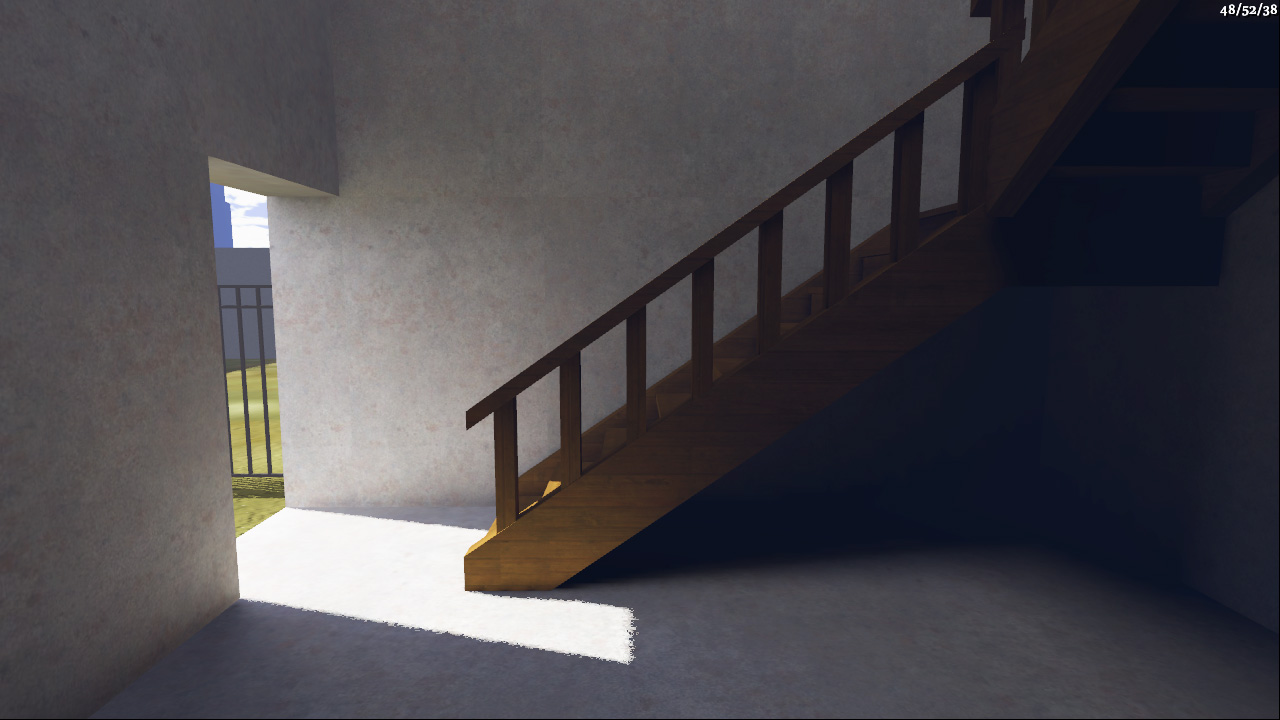
First, some shots of the house. The precomputed lighting is responsible for most of the light in the room. The places where you see sunlight hitting surfaces directly are dynamic; everything else is a static precompute. (Without the precomputed lighting, the entire room would be black except for the patches of sunlight).

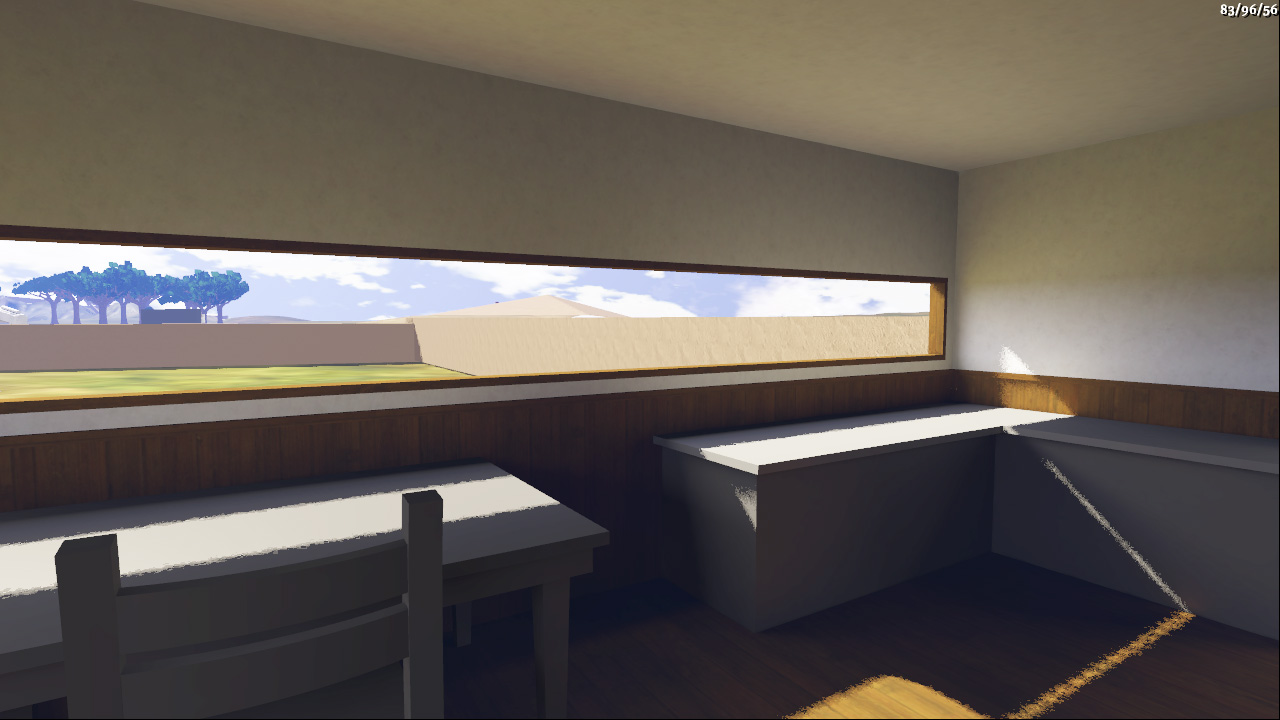
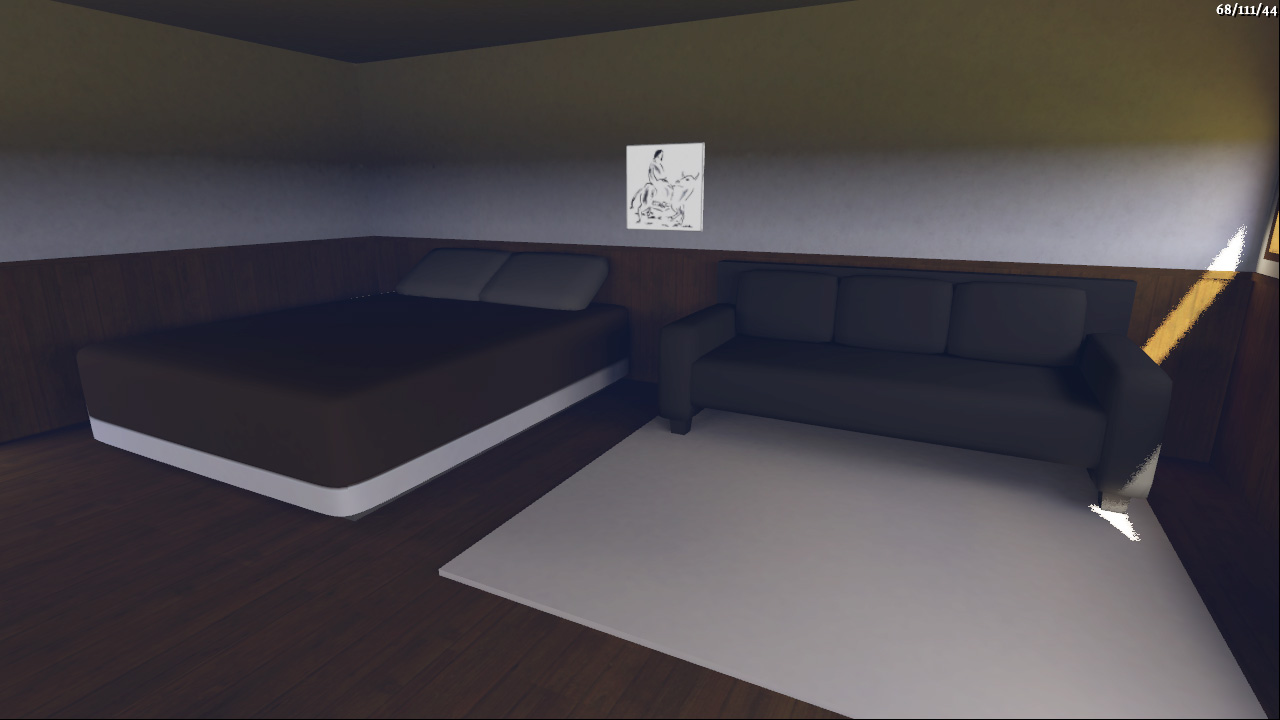
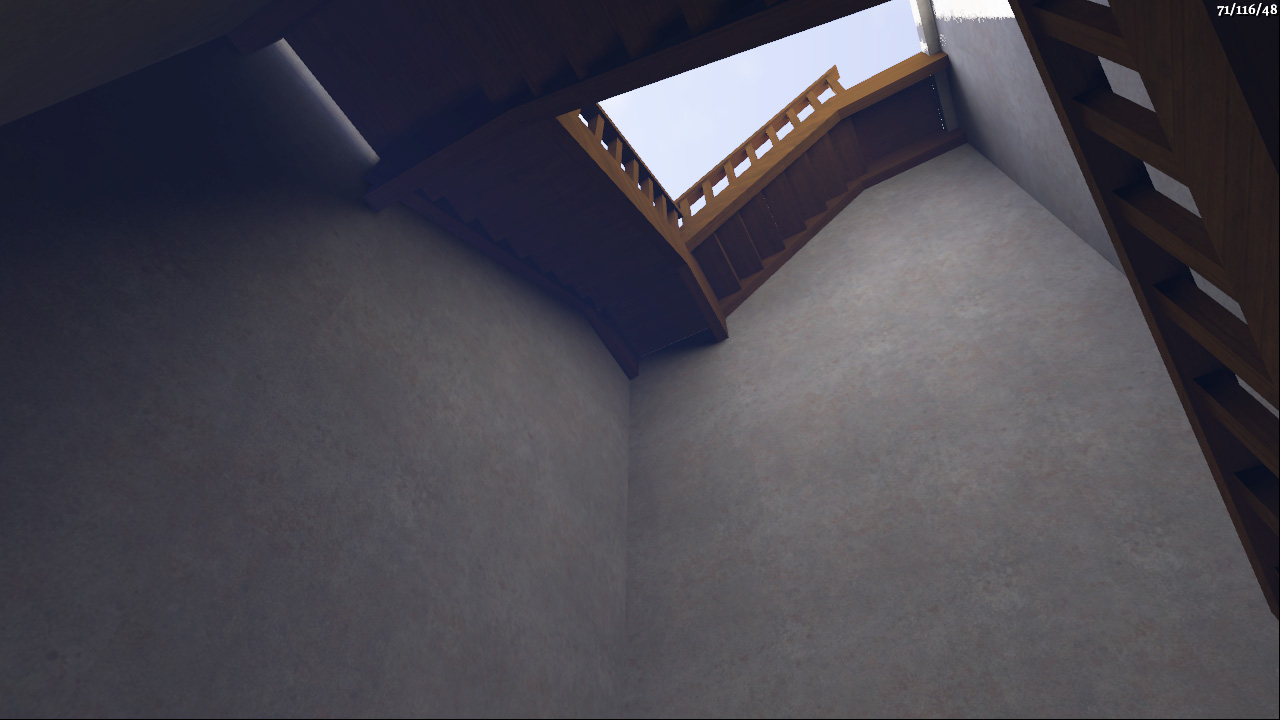
Note the ambient occlusion, soft shadows, and other nice effects that all come naturally from this system. (In the third image, the picture on the wall hasn't been lightmapped yet, which is why it sticks out so brightly.)
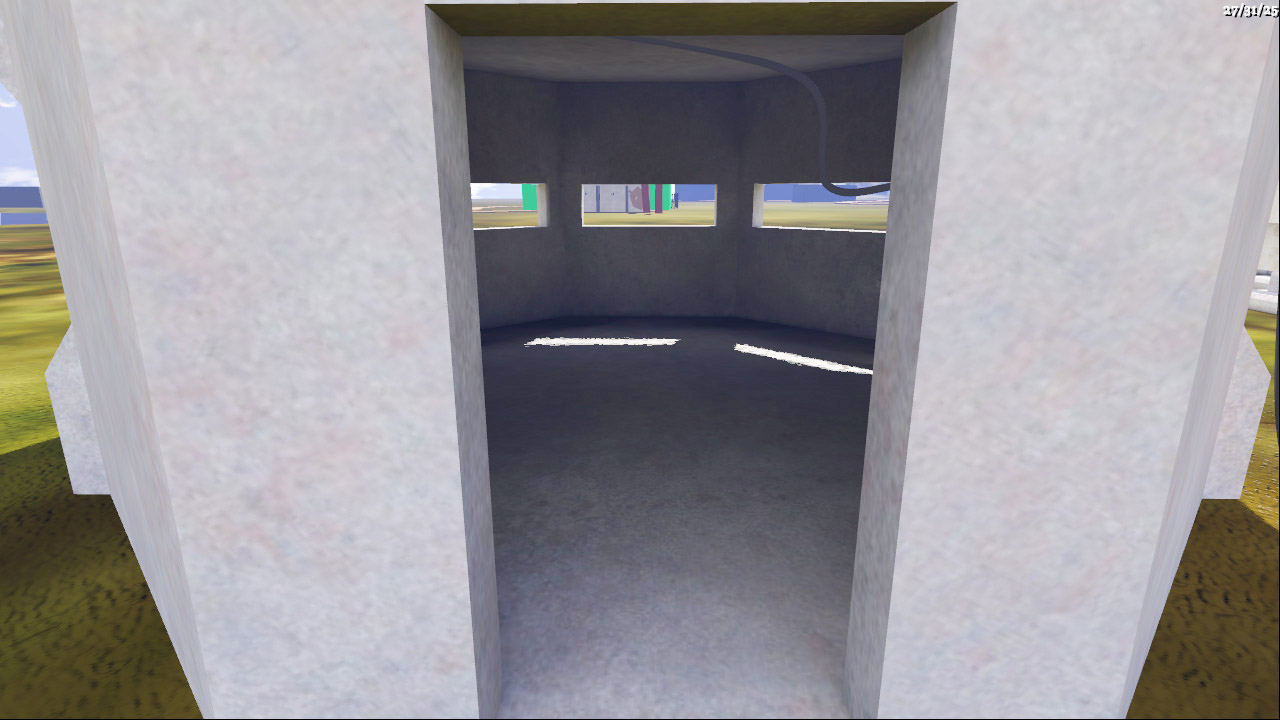
Here's a simple bunker interior consisting mostly of a single material and color.
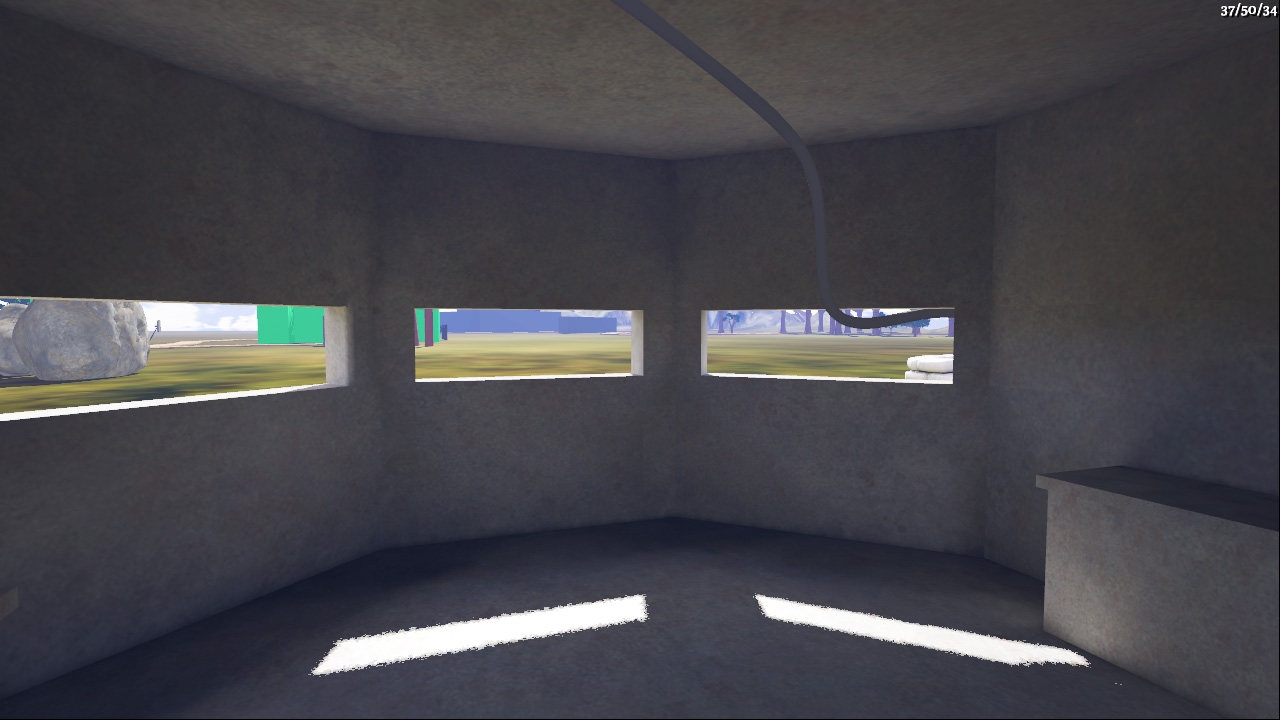
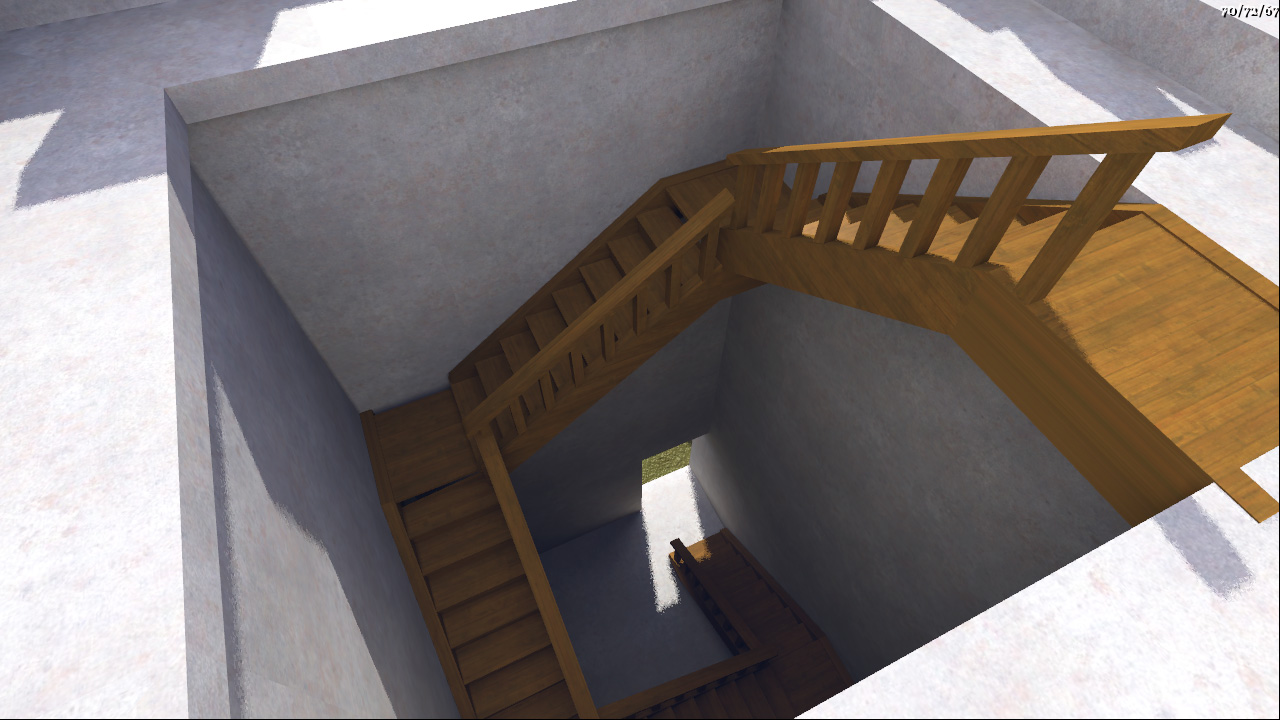
Lastly, the tower:
There are lots of caveats on these images. The game renders in HDR, but we haven't balanced our lighting constants or done tone mapping yet, so I have gamma-corrected the output images by various amounts. For now, we are computing only the first lighting bounce. We'll probably do at least 2 or 3 bounces for the final game, and when we have that running I'll post some comparison images. I believe our model of sky illumination is still overly simple and wrong (though I'd need to check with Ignacio on that, maybe he has fixed it up). I haven't played around with the results of the current system in outdoor areas (e.g. lots of small branches and leaves), though if we find that we have too many aliasing problems, we can always make the lightmaps higher-resolution in those areas.
In areas that have doors or windows that open and close, we are planning on layering a supplemental lightmap that gets scaled by the openness of that light aperture, then added to the base lightmap. This will provide a pretty good approximation for the way the indirect light in the room changes as the aperture opens and closes. Direct light will be completely correct since it uses the fully dynamic shadow system. I'll do a post about that shadow system sometime in the future.
Looks really nice, but it seems like essentially an expensive way to compute one bounce of radiosity. What interaction does this capture that radiosity doesn’t.
Between the screens and the concept art, I’m getting the sense that this will be riffing on Myst in the way that Braid riffed on Mario. Looking forward to it. :)
Hey, man, read the post! I say why we are doing this instead of radiosity. Also, it will do n bounces, it’s just that we are only doing one right now.
Radiosity is one way of computing global illumination; there are a lot of different ways, and they all have their own performance and quality characteristics.
I love blogs like this.
In regards to Ryan’s comment, it may be worth pointing out that many algorithms that people think of as radiosity-ish only compute a sloppy solution for the indirect lighting, such that final images are produced by the essentially the same process The Witness team is using.
It’s called “final gathering” in the literature, and it’s typically done by casting a bunch of rays into the scene and gathering the “radioisity”-ish-computed lighting from there, but HDR rendering works just as well. This is famously true of e.g. photon mapping solutions, which are too blotchy if rendered directly.
Of course typically that lighting solution they’re sampling is computed by other means, but this approach probably gets good results for N bounces in return for little programmer time.
That looks great, and really intuitive! Are you going to store any directional information in the lightmaps so that they can interact with the scene normal maps? If I recall correctly, the Source and Halo 3 engines do this using techniques like spherical harmonics or tri-directional lighting.
I did read it. :P It just wasn’t clear to me what the advantage was, but I think I understand it now. Essentially, as you add features to the renderer you don’t have to worry about maintaining more than one codepath, and the lighting will just work. The disadvantage I see over radiosity is that each bounce will be as expensive to compute as the first, whereas with radiosity, once you’ve built the transfer matrix, you can do as many bounces as you want essentially for free.
Yeah, Ryan — it’s not just that it’s only one code path, but it’s a substantially simpler path than trying to write a good radiosity solver anyway.
Also — we haven’t done any speed comparisons, but it is not clear to me intuitively whether this method is faster or slower than anything else, for equivalent quality levels.
David: Right now there are no plans for directional information. The game just doesn’t seem to need it. If we do want to do that as an extension in the future, it can be added to the same basic structure; you just have to analyze your rendered hemicube to classify the incoming light into whatever directional scheme you are using.
One thing I didn’t go into in the post above is that there are a lot of ways that quality levels can be adjusted to make a fast computation or a slow one. Ignacio has an irradiance caching mode in there, and the results come out a little more-inaccurately, but much faster. I think at some point he’s going to go back and try to make the irradiance-cached version be shipping quality. He’ll probably write about that in his upcoming post.
I’m so glad you are choosing a form of global illumination as a major part of the aesthetics. I love the feel of sunlight it creates. Almost impressionistic.
Out of interest: This reminds me of the id Tech 4 vs Source engine debate, I always preferred Source because it offers this softer lighting for world architecture. If I read it correctly, you are storing the static lighting information in pre-rendered patches that are projected over the textures? Like world lighting in the Source engine?
The directional information is something you probably won’t imagine needing until you have the final textures on there. The normal maps make a huge difference. I’m thinking of things like that leather couch and bedsheets in the starting room concept art. The biggest difference graphically between HL1 and HL2 was the normal maps on the textures in the latter. I’m sure you’ll make the right decision about it, but I wouldn’t prejudge it based on the “programmer” art. :)
It’s a little like world lighting in Source, but Source stores directional information whereas we are only doing color. You could actually think of it as being much like the lighting in Quake (though I don’t think Quake’s lighting was done in light-linear space… possibly an oversight on their part, or perhaps more likely they just liked everything super-dark and didn’t want lights to reach very far in general, so that when they dynamically invalidated something it wouldn’t cause a big CPU spike?)
One difference between Quake-style lighting and this is that we are only doing the indirect lighting this way, while direct lighting and shadows are done per-pixel every frame during gameplay.
Like anything, there are a lot of disadvantages and caveats that come with using a ‘non-standard’ method. Hemicube indirect illumination is clearly no exception, but there’s a good possibility given the constraints of your particular problem that overall it’s the best method.
I would check your timing to see what the biggest bottleneck is in the operation. I wouldn’t be surprised to find it was geometry, which doesn’t permit many (obvious) optimizations. But I suspect another one might be the CPU integration of the rendered hemicubes. There are many, many ways to obliterate this by means of using the same GPU that the scene was rendered on, but I’ll leave that as an exercise for the reader.
I realized as I was writing that that I wasn’t sure whether Ignacio is doing the integration on the CPU or GPU. So I left it as-is, considering that a minor detail. He has done a bunch of profiling, so he knows where the hotspots are.
Point is, it’s theoretically possible (and is a testament to a portion of the elegance of this particular solution to the global illumination problem) to compute the entire lightmap without “offloading to system memory” of any sort.
Regarding the directional information, I agree we might need it and that we won’t really know for sure until we have more final textures and normal maps. That said, this is pretty easy to add to the renderer, I’ve already played with that a bit, stored the incoming radiance in the SH basis and cleaned up my SH rotation code, so if we end up needing it, it will just be a small amount of work. The main problem, however, is coming up with efficient storage strategies for so much data.
We are currently doing the integration in the CPU, mainly because it’s my first GI renderer and it’s much easier to experiment in the CPU. That said, the code would map very easily to CUDA now and by doing the integration in the GPU we would save the expensive memory transfers. So, that’s something I might look at, but only when it becomes clear the code won’t undergo any significant change.
Doesn’t sound all that different from doing progressive radiosity with hemicubes, but still I’m looking forward to the in-detail description! I love these kinds of posts :)
Smart approach. Seems like a good example of using rendering tech to pursue a graphic style, rather than the other way round. There are a few games with painterly styles and outlines, and the rest are all about the traditional normal map, high specular, super noisy techno-fetish. So a game that’s all about large semi-flat areas of vibrant color with soft lighting is a good way to differentiate.
That reminds me of an article by Hugo Elias that I read quite a few years ago:
http://freespace.virgin.net/hugo.elias/radiosity/radiosity.htm
It seems like he came up with pretty much the same solution you did, though he had to deal with the total lack of HDR support in hardware a decade ago.
I’ve always wondered, what programming language do you use? is it the one you created, or a commercial one?
Hey Jonathan, have you looked into Spherical Harmonics? It’s a nice way of encoding direct and indirect lighting which is extremely quick to look up / render. It may not be a solution for all of your lighting needs ( ie. the full environment ) but works great for non static objects/characters. We used to on a more robust level for Avatar but I’ve also used it for realtime applications too.
( forgive me if this has already been discussed, I didn’t read all of the comments )
I’m also using this technique for the lighting in a small iPhone game I’m working on in my spare time. I’ve had two problems with it that I don’t think anyone else has mentioned.
1. Geometric aliasing: If one has very small intense lights the resolution of the hemicubes becomes a problem. Between two nearby hemicubes the light may wink in and out of existence when it goes from covering a single pixel in the hemicube at the first location to covering zero pixels at the second. There are of course other subtle sample artifacts as well but this is the most problematic. My “solution” was to crank up the resolution of the hemicube which of course absolutely kills the performance :(
2. Integration errors caused by floating point representation: After the rendering is finished you end up with a hemicube with (probably) a *very* wide range of values. Just looping over the values and simply adding them up is not a good idea. I’m not sure which is the best method of doing the summation, one idea I had was to first sort the numbers and then recursively add them pairwise, i.e. you create a new array half the size of the original array with the sum of the neighboring pairs in i and repeat this until there’s only one value left. I don’t know how feasible this solution is to implement on the GPU however.
Ignacio’s said he will post a detailed description of what he does at some point soon, but I’ll tell you what I know.
We definitely had issue #1 in our implementation (for low-res hemicubes, even those windows in the house are narrow enough to create a problem). The problem manifests itself as a dithering-like look in the image, as the light is hit or missed. We do at least two things to address this. One is to rotate each hemicube randomly around the normal. This does not eliminate the problem, but it prevents it from creating orderly-looking artifacts. (Which is why we get dithering instead of weird bands). The second is just to crank up the hemicube resolution and/or just run multiple samples per lightmap texel and blend. You can also render the hemicubes using MSAA, but that just pushes the problem size down a little further. I believe we have found that multiple samples per texel is much more effective.
I don’t think we have seen problem 2, but this may be because our dynamic range isn’t super-wide at this time (or maybe we are seeing it but haven’t noticed yet!)
How are you performing the integration? In order to avoid bias at the edges and corners, you must have to take the projected area of each of the hemicube texels into account, right?
Andreas: you should try Kahan summation.
This rendering style reminded me of a couple of things. First, this reminds me that there is a hemispherical rasterization using triage masks paper out here, but it is software oriented. IIRC, one of the things it did was make sure each sample of the hemicube was equally weighted, so that integration was just summation.
This also reminded me of my autostereo display/rendering days, and a variant on your algorithm that I would guess can be much faster.
Right now, you are doing:
For each light texel
For each direction
Cast ray
Where that inner loop is hardware accelerated. I suggest inverting:
For each direction:
For each light texel:
Cast ray
You have to decompose things into rectangular slabs (I.e. there is a constraints on the lightmap UV mapping) but then things get easy. You render from the slabs as near clipping plane and shear the eyepoint to sample direction. You can use perspective or orthodox, and you can jitter the lightmap per direction.
I should say (lest I lose Karma): I have not done implemented my technique for lightmapping, but have for a holographic display. Note you still have geometric aliasing problems, but now they are inter-view rather than intra-view. As a bonus, this was better for displays.
Hey Won, thanks for the comments. I haven’t yet seen any precision problems in the integrals, but as Jon pointed out our dynamic range is fairly small. As you suggest using Kahan sums is the way to go if that turns out to be a problem.
I suppose you are referring to “Hemispherical Rasterization for Self-Shadowing of Dynamic Objects”, they do use software rasterization indeed. I tried using several projections, but the hemicube worked best, all the non-linear projections required heavy tessellation in order to look reasonably good. There are some tricks you can do in the hardware to make hemicube rendering pretty fast, which I’ll write in a future post.
I believe there’s at least one game that used the approach you suggest, there was a presentation about it at Gamefest 3 or 4 years ago, but I cannot find it anymore. The main problem is that you need to capture multiple layers and in order to do that you have to render the scene using depth peeling multiple times. I guess that approach could end up being faster, but it seemed quite more complicated to implement.
The Kahan sums comment was more directed to the fellow who was thinking about doing some kind of recursive summation, which works and is more accurate, but Kahan is much faster.
Multiple layers and depth-peeling? I don’t see why…I suppose that depends on where you put your slabs. Anyway, it really does sound like it will be difficult/impossible to achieve the level of simplicity that you’ve achieved, especially when you factor in all the corner cases.
I’m not sure I understand the issue about layers or depth peeling, though. All I’m suggesting is that you can group the accumulation of multiple light texels simultaneously; they would still essentially occur on the surfaces. There’s really a continuum here. You can take a 32×32 patch of lightmap and render that in N directions. The slabs don’t have to be huge, but I suppose this is only really a win if you can sample directions sparsely.
Won, if you first divide the mesh into convex pieces, or patches that never self-overlap, then you don’t need depth-peeling. However, if you treat the entire mesh as a whole you need to use depth peeling to capture all layers of geometry from each direction. This is better explained in the following GPU Gems article:
http://http.developer.nvidia.com/GPUGems2/gpugems2_chapter38.html
Their performance numbers look better than ours, so maybe it was a mistake not to go that route after all.
So they use depth peeling to get the spatial resolution they need to capture those layers, but you can also strategically sample space by putting planes in the right places. For example, a BSP tree could do this. Then again, maybe depth peeling is really fast? I have never implemented it. Certainly, the occlusion dimension tends to be sparse.
Anyway, the fact that you have to maintain only one renderer is a huge advantage to the approach you chose. It is much easier to get help in computation than in writing algos!
What is the overhead like for generating the lightmap?
Obviously it will be massively geometry/scene dependant, but I would be interested to know how long it took to generate the lightmaps for the sample scenes you posted.
Hi, please could you (one of the developers), or anybody else for that matter, explain why you need to build your own ‘engine’ instead of using an existing engine such as the Unreal Engine 3 for example. What do you need to do that can’t be done with other engines? Doesn’t the Unreal Engine 3 allow you to do precomputed lighting? In general I am eager to understand why so many games use their own engines when they are not pushing technical boundaries. Or is this not the case? Do games generally use existing engines where they can?
Thank you for your time.